


Have you ever opened your kitchen cabinets in the spring and wondered how they got so grimy over the winter? You are not alone. Studies show that kitchen cabinets accumulate grease, dust, and food residue at a rate that most homeowners significantly underestimate, especially in high-use cooking areas. Spring kitchen cabinet cleaning is one of the most impactful tasks you can tackle during your seasonal home refresh, and doing it correctly can extend the life of your cabinets by years.
In this complete 2026 guide, you will learn exactly how to perform a thorough spring kitchen cabinet cleaning from top to bottom, including the right products for every cabinet material, a step-by-step process that actually works, the most common mistakes people make, and when it might be time to consider a professional upgrade. Whether your cabinets are painted wood, laminate, or solid hardwood, this guide covers everything you need.
Continue reading to discover how a single afternoon of focused cleaning can transform your kitchen and protect your investment.

What Is Spring Kitchen Cabinet Cleaning and Why Does It Matter?
Spring kitchen cabinet cleaning refers to the thorough, systematic process of removing accumulated grease, grime, dust, and residue from both the interior and exterior surfaces of your kitchen cabinets at the start of the spring season. Unlike routine wiping, a true spring clean involves emptying cabinets completely, treating surfaces with appropriate cleaning agents, addressing hardware, and inspecting for damage.
Why Your Cabinets Need More Than a Quick Wipe
Kitchen cabinets are exposed to steam, cooking grease, airborne food particles, and humidity every single day. Over a full winter of holiday cooking, baking, and daily meal preparation, that exposure compounds into a layer of buildup that standard surface wiping simply cannot address. The grease that settles on cabinet doors and frames acts as a magnet for dust and bacteria, creating a surface that looks dull, feels sticky, and can harbor odors.
According to the American Cleaning Institute, the kitchen is the room in the home that accumulates the most bacteria-prone surfaces, and cabinet fronts rank among the most neglected areas in routine cleaning schedules.
Beyond hygiene, neglecting your cabinets has real financial consequences. Grease and moisture that sit on wood or painted surfaces for extended periods can cause warping, peeling, and finish degradation. Replacing kitchen cabinets in Salt Lake City can cost anywhere from $5,000 to $25,000 depending on the scope of the project. A proper spring kitchen cabinet cleaning routine costs almost nothing by comparison and can add years to the life of your existing cabinetry.
If you are curious about what a full cabinet replacement or upgrade looks like, the team at Chris and Dick’s Cabinets and Countertops in Salt Lake City offers free consultations and can help you evaluate whether cleaning, refinishing, or replacing is the right move for your home.
How to Prepare for a Deep Spring Kitchen Cabinet Cleaning
Before you start scrubbing, preparation is everything. Rushing into the cleaning process without the right setup leads to missed spots, damaged surfaces, and wasted time.
Gather Your Supplies
Having everything within reach before you begin prevents interruptions and keeps the process efficient. Here is what you will need:
- Warm water
- Dish soap (mild, grease-cutting formula)
- White vinegar
- Baking soda
- Microfiber cloths (at least 6 to 8)
- Soft-bristle toothbrush or detail brush
- Spray bottle
- Bucket
- Murphy’s Oil Soap or a wood-safe cleaner (for wood cabinets)
- Cabinet-safe degreaser (for heavy grease buildup)
- Rubber gloves
- Step stool or ladder for upper cabinets
- Newspaper or drop cloth to protect countertops
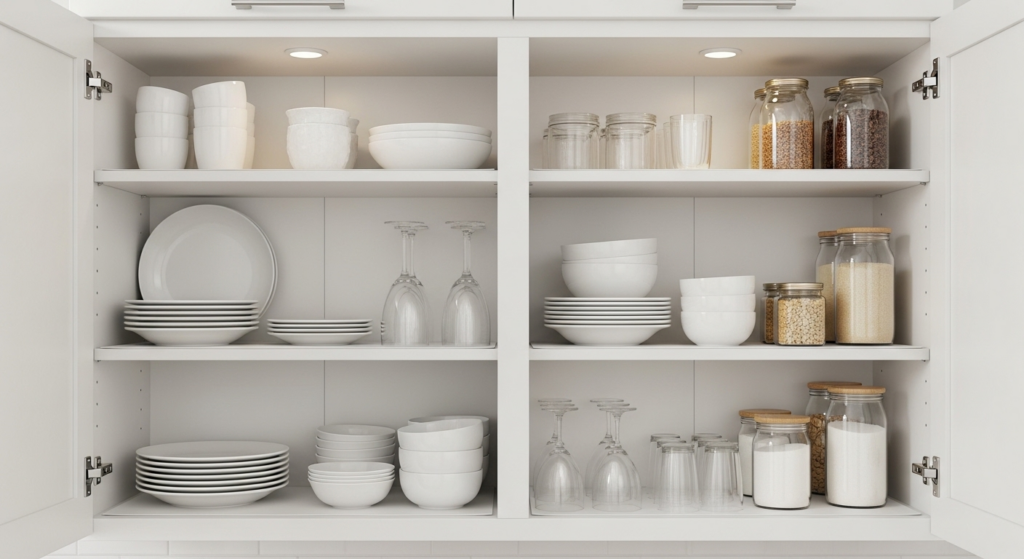
Empty and Organize Before You Clean
Remove everything from inside your cabinets before cleaning. This is also the perfect opportunity to declutter, check expiration dates on pantry items, and reorganize your storage. If you have been struggling with cabinet organization, Chris and Dick’s offers dedicated organization solutions that can help you maximize your cabinet space after your spring clean.
Place items on your countertops or kitchen table, grouped by category so that putting them back is faster and more intentional.
Step-by-Step Spring Kitchen Cabinet Cleaning Process
This is the core of your spring kitchen cabinet cleaning routine. Follow these steps in order for the best results.
Step 1: Dust and Dry-Wipe All Surfaces First
Before applying any liquid, use a dry microfiber cloth to remove loose dust from the tops, sides, and fronts of all cabinets. Pay special attention to the tops of upper cabinets, which collect thick layers of grease-coated dust that can turn into a paste when wet. Work from top to bottom so that any falling debris lands on surfaces you have not yet cleaned.
Step 2: Mix Your Cleaning Solution
For most cabinet surfaces, a simple solution of warm water and a few drops of dish soap is highly effective. Fill a spray bottle with this mixture for easy application. For heavier grease buildup, add one tablespoon of white vinegar per cup of water to boost degreasing power.
For solid wood cabinets, avoid vinegar-heavy solutions as the acidity can dull the finish over time. Instead, use a diluted Murphy’s Oil Soap solution, which cleans effectively while conditioning the wood.
To clean kitchen cabinets effectively, mix one cup of warm water with two teaspoons of dish soap and one tablespoon of white vinegar in a spray bottle. Apply to cabinet surfaces, let sit for 30 seconds, then wipe clean with a microfiber cloth. For wood cabinets, substitute vinegar with a wood-safe cleaner like Murphy’s Oil Soap.
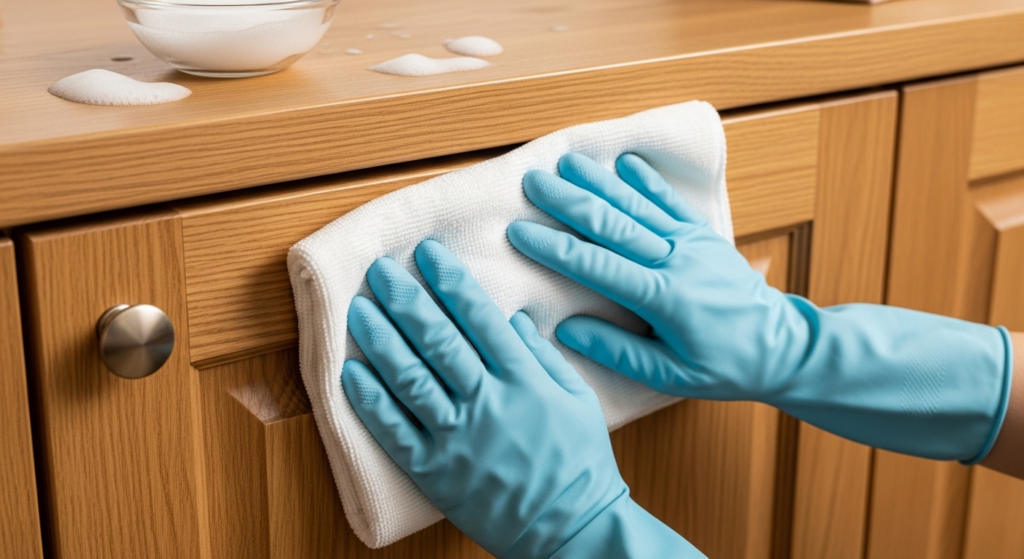
Step 3: Clean Cabinet Exteriors
Spray your cleaning solution onto a microfiber cloth rather than directly onto the cabinet surface. This prevents excess moisture from seeping into seams or joints. Wipe in the direction of the wood grain using gentle, circular motions for stubborn spots.
For painted cabinets, use minimal moisture and dry the surface immediately after wiping to prevent paint from softening or peeling.
For laminate cabinets, avoid abrasive scrubbers. A soft cloth with your cleaning solution is all you need.
Step 4: Address Grease Buildup Around Handles and Hinges
The areas immediately surrounding cabinet hardware are the most grease-prone spots on any cabinet. Use a soft-bristle toothbrush dipped in your cleaning solution to scrub around hinges, handles, and knobs. For stubborn grease, apply a small amount of baking soda paste (baking soda mixed with just enough water to form a thick consistency) and let it sit for two minutes before scrubbing.
Step 5: Clean Cabinet Interiors
Wipe down the interior walls, floor, and ceiling of each cabinet with a lightly dampened cloth. Remove any shelf liners and wash them separately or replace them entirely. Check for signs of moisture damage, pest activity, or mold, which can indicate a larger issue that needs professional attention.
Step 6: Clean and Polish Hardware
Remove handles and knobs if possible and soak them in warm soapy water for 10 to 15 minutes. Dry thoroughly before reinstalling. For brass or brushed nickel hardware, use a hardware-specific polish to restore shine without scratching the finish.
Step 7: Dry Everything Thoroughly
This step is non-negotiable. Any residual moisture left on wood or painted surfaces can cause swelling, warping, or mildew growth. Use a dry microfiber cloth to wipe down every surface you cleaned, then allow cabinets to air dry with doors open for at least 30 minutes before restocking.
Step 8: Apply a Protective Finish (Optional but Recommended)
Once your cabinets are clean and dry, applying a thin coat of furniture wax or a cabinet-specific polish creates a protective barrier that repels future grease and makes routine cleaning significantly easier. For wood cabinets, a beeswax-based polish works beautifully. For painted or laminate surfaces, a light coat of car wax applied with a soft cloth provides similar protection.
Best Cleaning Products for Every Cabinet Material
Not all cabinets respond the same way to cleaning products. Using the wrong cleaner on the wrong material is one of the most common and costly mistakes homeowners make during spring kitchen cabinet cleaning.

Cleaning Product Comparison Table
| Cabinet Material | Recommended Cleaner | Avoid | Notes |
|---|---|---|---|
| Solid Wood | Murphy’s Oil Soap, diluted dish soap | Vinegar-heavy solutions, bleach | Always wipe with the grain |
| Painted Wood | Mild dish soap and water | Abrasive scrubbers, ammonia | Dry immediately to protect paint |
| Laminate | Dish soap and water, all-purpose cleaner | Steel wool, harsh solvents | Avoid excess moisture at seams |
| Thermofoil | Mild soap and water | Heat-based tools, harsh degreasers | Thermofoil can peel if overheated |
| Stainless Steel | Stainless steel cleaner, white vinegar | Bleach, abrasive pads | Wipe in the direction of the grain |
| Glass Inserts | Glass cleaner | Ammonia-based cleaners on frames | Protect surrounding wood when cleaning |
Common Mistakes to Avoid During Spring Kitchen Cabinet Cleaning
Even well-intentioned homeowners make errors that can damage their cabinets or reduce the effectiveness of their cleaning efforts. Here are the most frequent mistakes and how to avoid them.
Using Too Much Water
Excess moisture is the number one enemy of kitchen cabinets, particularly those made from wood or MDF. Always apply cleaning solutions to your cloth first, never spray directly onto the cabinet surface in large quantities. Wipe dry immediately after cleaning.
Skipping the Hardware
Cabinet handles and hinges are touched dozens of times per day and accumulate bacteria, grease, and grime at a higher rate than any other surface. Skipping hardware during your spring kitchen cabinet cleaning leaves behind a significant source of contamination and visual dullness.
Using Abrasive Tools on Delicate Finishes
Steel wool, rough sponges, and abrasive powders can permanently scratch painted, laminate, and thermofoil surfaces. Always use soft microfiber cloths or soft-bristle brushes.
Ignoring the Tops of Upper Cabinets
The tops of upper cabinets are out of sight and therefore out of mind for most homeowners. However, they accumulate a thick, sticky layer of grease and dust that can eventually drip down onto cabinet fronts. Include them in every spring kitchen cabinet cleaning session.
Restocking Before Surfaces Are Fully Dry
Placing items back into cabinets before they are completely dry traps moisture and can lead to mold growth, warped shelves, and musty odors. Always allow a minimum of 30 minutes of air drying time.
How Often Should You Deep Clean Kitchen Cabinets?
Recommended kitchen cabinet cleaning frequency:
- Daily: Wipe down cabinet fronts near the stove and sink with a damp cloth
- Weekly: Quick wipe of all cabinet exteriors with a mild cleaning solution
- Monthly: Clean hardware and address any visible grease spots
- Seasonally (Spring and Fall): Full deep clean including interiors, hardware removal, and protective finish application
- Annually: Inspect for structural damage, hinge wear, and finish degradation
When Is It Time to Replace Instead of Clean?
Spring kitchen cabinet cleaning is a powerful maintenance tool, but it has limits. There are situations where cleaning is no longer enough and replacement or refacing becomes the smarter investment.
Signs that your cabinets may need more than a spring clean include:
- Persistent warping or swelling that does not resolve after drying
- Peeling laminate or thermofoil that cannot be re-adhered
- Structural damage to hinges, frames, or drawer slides
- Deep staining or discoloration that cleaning cannot remove
- Outdated layout that no longer serves your cooking habits
If you are seeing any of these signs in your Salt Lake City home, the team at Chris and Dick’s Cabinets and Countertops specializes in custom cabinet design and installation. They serve homeowners throughout the Salt Lake City area and surrounding communities, and you can explore their full service area at chrisanddicks.

Local Spotlight: What Salt Lake City Homeowners Are Saying
Real homeowners in the Salt Lake City area have experienced firsthand the difference that proper cabinet care and professional cabinet services can make. Here are a few verified reviews from Chris and Dick’s Cabinets and Countertops:
“We had our kitchen cabinets completely replaced by Chris and Dick’s after years of trying to maintain our old ones. The quality of the new cabinets is outstanding, and the team was professional from start to finish. Highly recommend to anyone in Salt Lake City.” — Sarah M., Google Review, 5 stars
“I came in just looking for advice on cleaning my existing cabinets, and the staff was incredibly helpful. They gave me honest recommendations and didn’t try to upsell me on anything I didn’t need. That kind of integrity is rare.” — James T., Google Review, 5 stars
“Chris and Dick’s helped us design a completely custom kitchen layout. The craftsmanship is exceptional and the whole process was smooth. Our kitchen looks like something out of a magazine.” — Linda R., Houzz Review, 5 stars
You can read more reviews and explore their portfolio on Houzz, Angi, and Google Maps.
Practical Tips to Maintain Clean Cabinets All Year Long
Completing your spring kitchen cabinet cleaning is a major accomplishment, but maintaining that cleanliness throughout the year requires a few simple habits.
Install a Range Hood or Improve Ventilation
One of the most effective ways to reduce grease buildup on cabinets is to improve kitchen ventilation. A properly functioning range hood captures airborne grease before it settles on surfaces. If your range hood is underperforming, cleaning or replacing the filters is a quick fix that pays dividends in reduced cabinet maintenance.
Use Cabinet Liners
Shelf liners protect interior cabinet surfaces from spills, scratches, and moisture. They are inexpensive, easy to replace, and dramatically reduce the time required for interior cabinet cleaning.
Wipe Down After Heavy Cooking Sessions
After cooking particularly greasy or steamy meals, take two minutes to wipe down the cabinet fronts nearest to the stove. This prevents grease from hardening and makes your next spring kitchen cabinet cleaning significantly easier.
Address Spills Immediately
Liquid spills that are allowed to dry on cabinet surfaces, particularly on wood or painted finishes, can cause staining and finish damage that is difficult or impossible to reverse. Keep a microfiber cloth accessible in the kitchen for immediate spill response.
Is your spring kitchen cabinet cleaning revealing damage, wear, or a layout that no longer works for your family? Chris and Dick’s Cabinets and Countertops in Salt Lake City offers expert consultations for custom cabinets, countertop installation, and kitchen organization solutions. Visit their gallery to see recent projects, or explore financing options that make a kitchen upgrade more accessible than you might think. Contact the team today to schedule your free consultation.
Common Questions About Spring Kitchen Cabinet Cleaning
Q1: What is the best homemade cleaner for kitchen cabinets?
The best homemade cleaner for kitchen cabinets is a mixture of one cup of warm water, two teaspoons of dish soap, and one tablespoon of white vinegar. Apply with a microfiber cloth, wipe in the direction of the wood grain, and dry immediately. For wood cabinets, replace vinegar with a few drops of Murphy’s Oil Soap to avoid dulling the finish.
Q2: How do you remove sticky grease from kitchen cabinet doors?
To remove sticky grease from kitchen cabinet doors, apply a paste made from equal parts baking soda and coconut oil or dish soap directly to the greasy area. Let it sit for three to five minutes, then scrub gently with a soft-bristle brush. Wipe clean with a damp microfiber cloth and dry thoroughly. For severe buildup, a commercial cabinet degreaser applied according to label instructions is the most effective option.
Q3: How often should kitchen cabinets be deep cleaned?
Kitchen cabinets should be deep cleaned at least twice per year, ideally in spring and fall. A full deep clean includes emptying all contents, cleaning interior and exterior surfaces, addressing hardware, and applying a protective finish. Between deep cleans, a weekly wipe-down of exterior surfaces and immediate attention to spills will keep cabinets in good condition.
Q4: Can I use vinegar to clean wood kitchen cabinets?
Vinegar can be used on wood kitchen cabinets in diluted form, but it should be used sparingly. The acidity in vinegar can dull or damage certain wood finishes over time, particularly on cabinets with a wax or oil-based finish. For regular cleaning of wood cabinets, a mild dish soap solution or a product specifically formulated for wood, such as Murphy’s Oil Soap, is a safer and more effective choice.
Q5: When should I replace my kitchen cabinets instead of cleaning them?
You should consider replacing your kitchen cabinets when cleaning no longer addresses the underlying issues. Signs that replacement is warranted include persistent warping, peeling laminate, structural damage to frames or hinges, deep staining that cannot be removed, and a layout that no longer meets your functional needs. If you are in the Salt Lake City area, Chris and Dick’s Cabinets and Countertops can help you evaluate your options and design a custom solution that fits your home and budget.
Conclusion
Spring kitchen cabinet cleaning is one of the highest-return maintenance tasks a homeowner can perform. By following the step-by-step process outlined in this guide, using the right products for your specific cabinet material, avoiding the most common cleaning mistakes, and establishing a year-round maintenance routine, you can protect your cabinets, improve your kitchen’s hygiene, and extend the life of one of your home’s most-used surfaces.
To recap the key takeaways from this guide:
- Always prepare your space and gather supplies before starting your spring kitchen cabinet cleaning
- Use material-appropriate cleaning solutions and avoid excess moisture on all surfaces
- Clean from top to bottom, including the often-forgotten tops of upper cabinets
- Address hardware thoroughly, as it is the most bacteria-prone surface in the kitchen
- Dry all surfaces completely before restocking
- Establish a weekly and monthly maintenance routine to make future deep cleans easier
- Know when cleaning is no longer enough and replacement is the smarter investment
If your spring kitchen cabinet cleaning has revealed damage, wear, or a kitchen that simply no longer works for your lifestyle, the experts at Chris and Dick’s Cabinets and Countertops are ready to help. Located at 1499 W 3500 S, Salt Lake City, UT 84119, they serve homeowners throughout the Salt Lake City area with custom cabinet design, countertop installation, and organization solutions built to last.
Ready to take your kitchen to the next level? Request your free consultation with Chris and Dick’s Cabinets and Countertops today and discover what a difference the right cabinets can make in your home.
You can also follow Chris and Dick’s on Instagram, Facebook, and Pinterest for design inspiration, cleaning tips, and behind-the-scenes looks at their latest kitchen projects.
Chris and Dick’s Cabinets and Countertops 1499 W 3500 S, Salt Lake City, UT 84119 Phone: (385) 832-6077 Email: information@chris-n-dicks.